This post took me longer than expected. A little over a month. The two main repositories took me longer. This is to answer a question: how can I easily document a web component created with Svelte?
Introduction
Before starting I have to clarify a couple of things. First of all, this post consists of three parts.
The first part takes up the discourse begun with this article:
I take up my hypothesis from a month and a half ago and present the two repositories that I will use.
The second part is a review of how to create a blog on GitHub using static pages. It is basically a summary of this piece:
Finally the third part is about how to use Markdown (md) files together with Svelte components.
I’m not starting from a new component but from one I’ve already created:
So with that said, let’s get started.
How to create documents that document themselves
To simplify the creation of the Svelte component documentation I have created 2 NPM packages. The first, @el3um4s/svelte-get-component-info, has the task of parsing the component and extracting a JSON object with the basic information. The second, @el3um4s/svelte-component-info, takes care of transforming this information into a readable format on the screen.
Why did I split the project in two? Because in this way it is possible to create different graphic presentations, if someone wants to do it.
I begin by installing the first one:
npm i -D @el3um4s/svelte-get-component-info
I then create a getInfoSvelteComponents.js file that allows me to read all the files in the src\lib\components directory. After extracting the data I need, I save it in an infoSvelteComponents.json file in the src\routes folder:
It can also be useful, but not essential, to create a getInfoSvelteComponents-watcher.js file to automatically intercept any changes to the component source code:
So I add a couple of scripts to package.json:
When I run npm run get-info-svelte-components I get a file similar to this:
For each component in the lib\components directory I get an object with 4 properties:
- props
- actions
- slots
- css
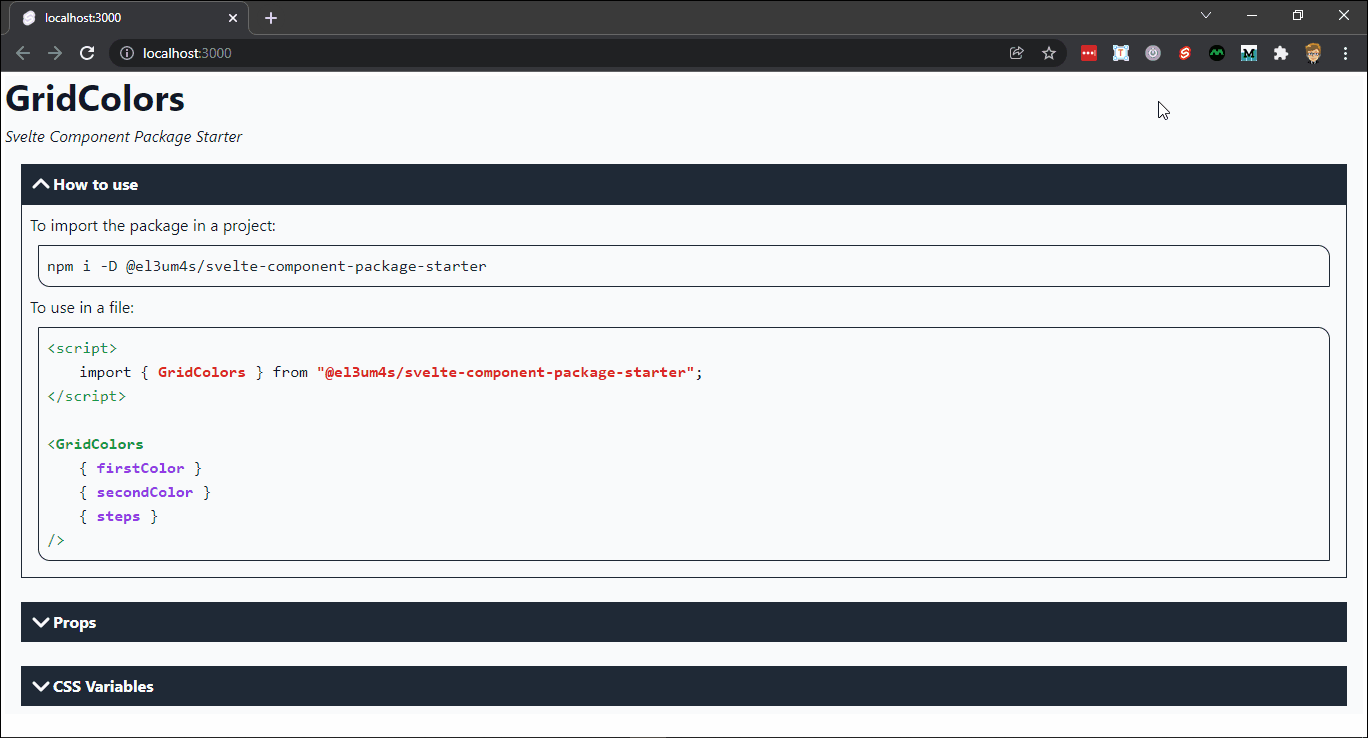
I can import this information into the src\routes\index.sveltefile
This alone would be enough to create an automatic documentation system: just extract the information contained in infoSvelteComponents and that’s it.
I preferred to create a specific component, @el3um4s/svelte-component-info. I install it with:
npm i @el3um4s/svelte-component-info
I then import the component into the index.svelte file:
I get a page like to this:
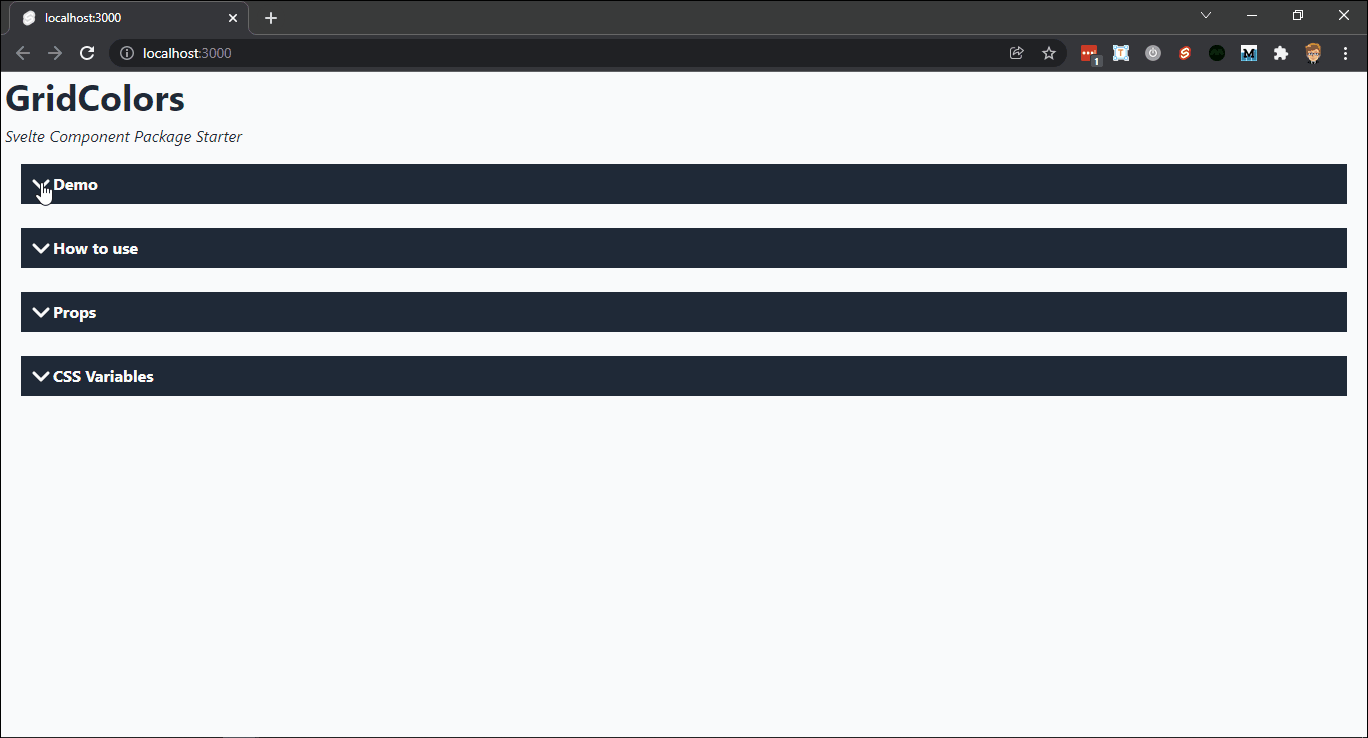
I add a slot="demo" to show a preview of the component:
This way I get this:
And with this I concluded the first part.
But one question remains: how can I automatically upload pages created by SvelteKit to GitHub?
How to use SvelteKit with GitHub Pages
I start from the article How to Use SvelteKit with GitHub Pages to use markdown as documentation of my components. I install gh-pages:
npm install gh-pages --save-dev
and then I add a script to package.json:
I create the gh-pages.js file:
Then I add the adapter-static to get pages ready for GitHub:
npm i -D @sveltejs/adapter-static@next
I update the svelte.config.js file:
I add the .nojekyll file to the static folder.
Whenever I create a new version of the documentation it is worth cleaning up the build folder containing the previous one. I can do this directly from NodeJs, by creating a clean-build.js file:
I edit package.json:
To upload the documentation to GitHub Pages, simply use the commands:
npm run build
npm run deploy
I get a web page similar to this
As long as it is a single component this is sufficient. However, I prefer to use markdown files.
How to use Markdown with SvelteKit
I import mdsvex:
npm i -D mdsvex
npx svelte-add@latest mdsvex
npm install
And I set the configuration file mdsvex.config.js
Finally I modify svelte.config.js to recognize the md files
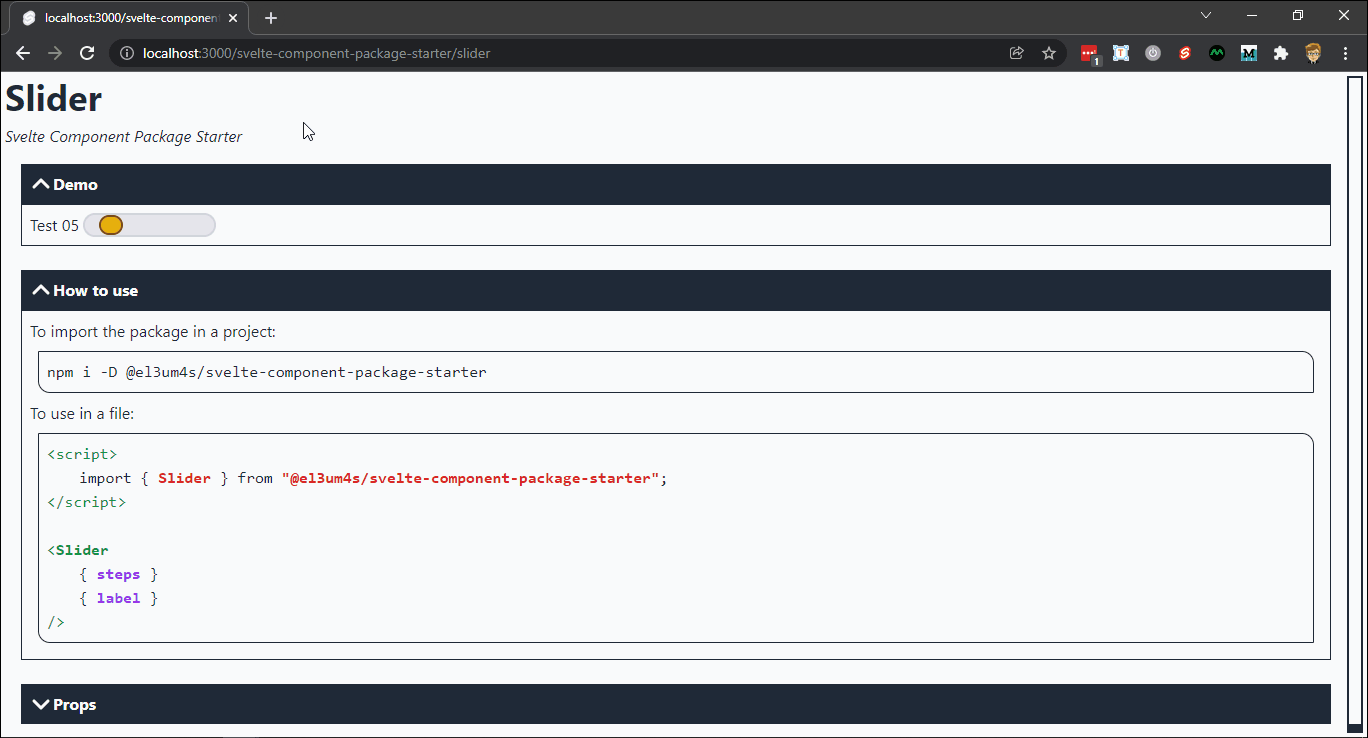
Now I can use the md files as pages in the routes directory. I then rename the index.svelte file to index.md.
I can create a slider.md file to document this component:
So on page el3um4s.github.io/svelte-component-package-starter/slider I find something like this:
And this is all. The project repository is here:


