For the past two weeks I have been experimenting with Deno, Construct 3 and Microsoft Edge WebView2. I went back to an old project and made some progress thanks to the combination of these 3 technologies. As usual, I uploaded the project to GitHub.
Today I want to report some notes on how to integrate these three tools. The example project does one thing: it performs random operations. It has no practical use other than showing how to create a local server (with Deno), open a Windows application (via WebView2) and use C3 to get the result.
I start with the “easy” part: the Construct 3 project.

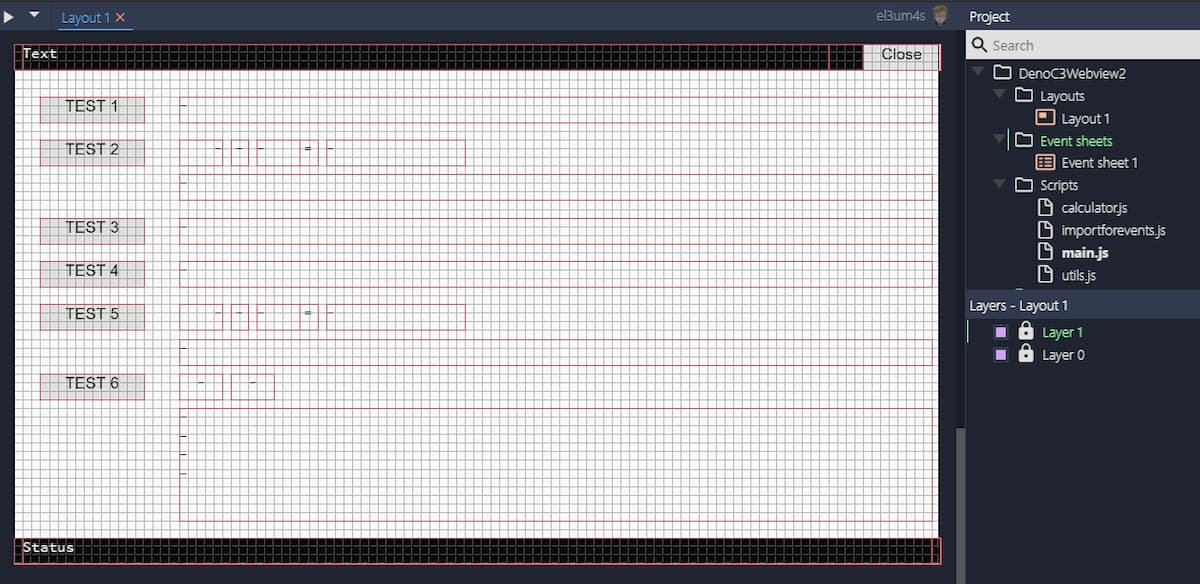
The structure is much more linear and simple than my latest templates:
- 1 layout
- 1 event sheet
- 4 js files, of which 2 are the standards
main.jsandimportforevents.js
I preferred to directly insert some JavaScript code in the event sheet

Obviously it would make more sense to do a nice refractoring to delete duplicate code. But for the moment let’s just look at how it works:
const responses = await fetch(`http://localhost:8081/addition/?a=1&b=10`);
const results = await responses.json();
const resultRounded = roundResult(results);

log("OperationResult", resultRounded);
log("ResultTestB", `${results.operation}(${results.a}; ${results.b}) = ${resultRounded}`);
This snippet queries the server for 1 + 10. Then writes the result in the ResultTestB text box. The log command is not native to C3 but is a function inserted in the file utils.js.
In the example file (you can download it from GitHub) there are some other uses of the same pattern. An interesting one is inserted at the start of the layout.
window.addEventListener('beforeunload', async (e) => {
	e.preventDefault();
	await fetch(`http://localhost:8081/close`);
});
This code allows you to automatically close the server when the browser window is closed. This only makes sense if we want to create a stand alone program for Windows. And speaking of that, let’s move on to the second technology, Microsoft Edge WebView2. For the moment I use the experimental Construct wrapper (the one presented in this forum).
Just download the file from the forum, extract it and then copy the C3 project to the www folder. The project must be exported as Web (HTML5). Then you run the WebView2Wrapper.exe file and, voila, here’s our example running on Windows. Well, working is a big word, because if we try to click any of the buttons, nothing happens. To make the magic happen, you first need to start a local server, configure it and understand how to handle the various requests coming from Construct. And this is where Deno comes to our aid.
Obviously, as soon as I finished writing this article, a new Construct update came out: now you can export directly with WebView2. However, the procedure is the same: copy the contents of the zip file (the
wwwfolder and theDenoC3Webview2.exe,DenoC3Webview2.dllandpackage.jsonfiles) into theappfolder.
Deno is a runtime for JavaScript and TypeScripe. It has some very interesting features, and that’s what gives me hope for the future. Better, for the possibility, in the future, to be able to develop some of my old ideas. I’ll talk about it sooner or later. I leave out the part dedicated to the installation and presentation of its features, which are so well explained on Deno.land.
Let’s look at the structure of the project

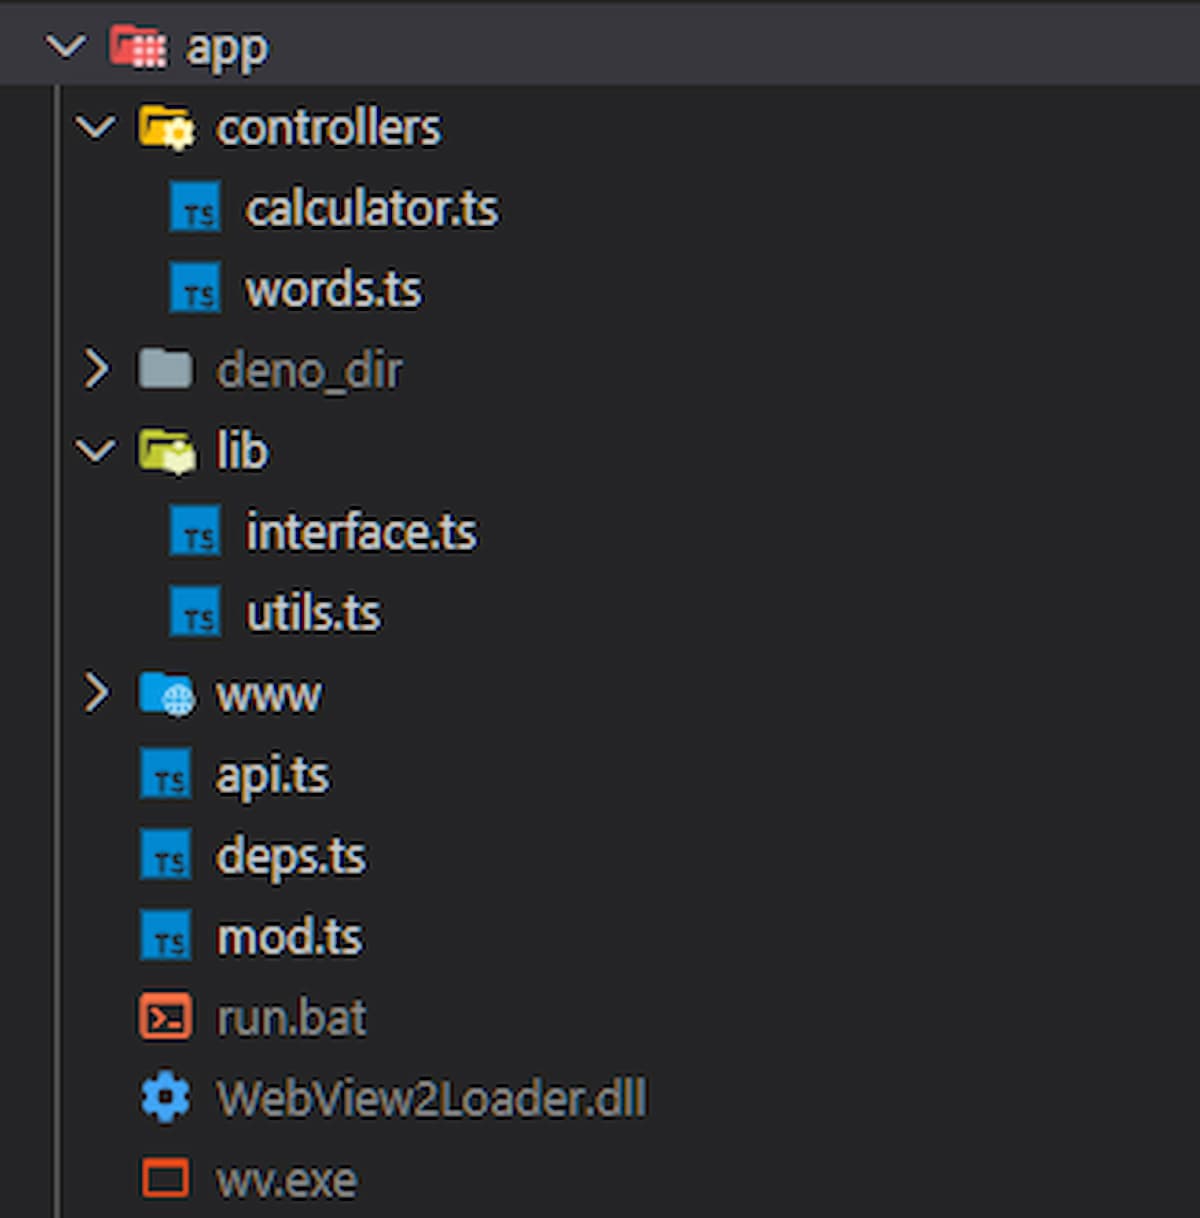
There are several folders in the repository, but the one with the actual project is called app.Inside are the folders:
- controllers
- lib
- www
and the files:
- deps.ts
- mod.ts
- api.ts
deps.ts contains the list of external dependencies of the project. Since it is quite simple, we only need one:
export {
  Application,
  Context,
  helpers,
  Router,
} from "https://deno.land/x/oak/mod.ts";
I import oak, a middleware framework for Deno’s net server
mod.ts is our entry point and contains the code to launch the server:
const app = new Application();
const port = 8081;

app.use((ctx, next) => {
  ctx.response.headers.set("Access-Control-Allow-Origin", "*");
  return next();
});

app.listen({
  port: port,
});
In mod.ts I also set the server
app.use((ctx, next) => {
  ctx.response.headers.set("Access-Control-Allow-Origin", "*");
  return next();
});

app.use(api.routes());
app.use(api.allowedMethods());
I manage the closing of the application
const { signal } = controller;
app.listen({
  port: port,
  signal,
});
As a last command I launch WebView2
Deno.run({ cmd: ["./wv.exe"] });
Once you’ve set up your server it’s time to move on to the APIs. They are encoded in the api.ts file:
import { Context, Router } from "./deps.ts";
import * as words from "./controllers/words.ts";
import * as calculator from "./controllers/calculator.ts";

export const controller: AbortController = new AbortController();
export const api: Router = new Router();

api.get("/close", (ctx: Context) => {
  controller.abort();
});

api.get("/", words.message);
api.get("/random-operation", calculator.randomOperation);
api.get("/calc/:operation/", calculator.calc);
api.get("/addition/", calculator.addition);
api.get("/subtraction/", calculator.subtraction);
api.get("/multiplication/", calculator.multiplication);
api.get("/division/", calculator.division);
api.get("/remainder/", calculator.remainder);
api.get("/exponent/", calculator.exponent);
I set up an AbortController controller to tell Deno to shut down the server when the http://localhost:8081/close address is queried. The remaining APIs call some functions found in the words.ts and calculator.ts files. Let’s see what happens when we query the address of the first example, http://localhost:8081/addition/?a=1&b=10.
export function addition(ctx: Context) {
  const results: Results = calculateFromContextWithOperation(ctx, "addition");
  ctx.response.body = results;
}
First I run the calculateFromContextWithOperation(ctx, operation) function which returns a result. This result is then sent to the application web page, that is to our Construct 3 project. C3 receives the result of the operation and uses it to update a text box.
export function calculateFromContextWithOperation(
  ctx: Context,
  operation: string,
): Results {
  const params: APIParams = helpers.getQuery(ctx, { mergeParams: true });
  const paramWithoutOperation: APIcalculator = sanitizeParams(params);
  const param = addOperation(operation, paramWithoutOperation);
  const results: Results = calculateFromAPIcalculator(param);
  return results;
}
calculateFromContextWithOperation takes the parameters passed through the request, i.e. ?a=1&b=10. It basically extracts a = 1 and b = 10. Then through the sanitizeParams(params) function it performs some checks. Finally, calculateFromAPIcalculator takes care of the calculations.
function calculateFromAPIcalculator(param: APIcalculator): Results {
  const results: Results = {
    results: "",
    ok: false,
    operation: param.operation,
    a: param.a,
    b: param.b,
};

  if (param.aPresent && param.bPresent && param.operationPresent) {
    const result: number = utils.calc({
      operation: param.operation,
      a: param.a,
      b: param.b,
    });
    results.results = `${result}`;
    results.ok = true;
  }

  return results;
}
The interfaces used are defined in interface.ts
export interface APIParams {
  operation?: string;
  a?: string;
  b?: string;
  first?: string;
  second?: string;
}

export interface APIcalculator {
  operationPresent: boolean;
  operation: string;
  aPresent: boolean;
  a: string;
  bPresent: boolean;
  b: string;
}

export interface Results {
  results: string;
  ok: boolean;
  operation: string;
  a: string;
  b: string;
}
Well, this is how the whole project works. Now it’s just a matter of running it from the command line with the code:
deno run --allow-run --allow-read --allow-net mod.ts
But that’s not all. One step is still missing to get a completely stand-alone project. We can choose two alternatives, or compile the project or download the external libraries without having to recall them from the internet.
To compile the project you need to use the compile command
deno compile --allow-run --allow-read --allow-net --unstable --output run.exe mod.ts
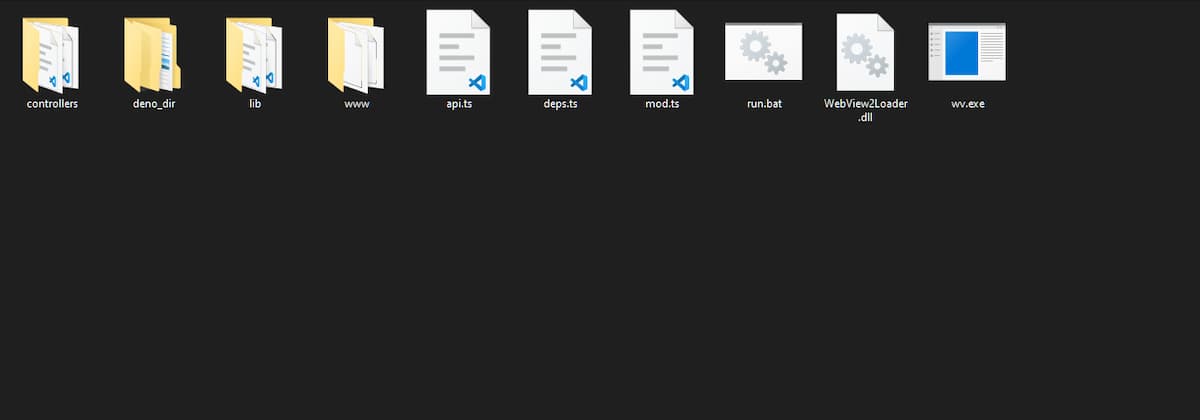
This allows us to get the run.exe file, which is all we need to run the program. How to distribute it? Just create a ZIP archive, and insert inside the run.exe files, the wv.exe file (it is the renamed WebView2Wrapper.exe file), the WebView2Loader.dll file and the www folder.

In the repository, in the Releases section there is a sample ZIP file.
The second method requires you to download all the necessary files and tell Deno to use those. On Windows it is useful to use a bat file (see run-deno-dir.bat):
echo OFF
SET position=%~dp0%
ECHO %position%
echo Set DENO_DIR position
set DENO_DIR=%position%deno_dir
@deno.exe "info" %*
echo Version
@deno.exe "--version" %*
echo Launch server
@deno.exe "run" "--allow-run" "--allow-read" "--allow-net" "mod.ts" %*
I run this file a first time to download all dependencies in the deno_dir folder. Then I zip all the contents of the app folder and I can distribute the program. However, the application can only be run by those who have Deno installed on their computer.

Finally, a comparison of the dimensions of the different ways of distributing our program:

The heaviest file is around 8MB: definitely less than the nearly 100MB required by Node for the same program. The other two files are even lighter, making this mix even more interesting.
Ok, that’s it. I only remember the address of the project and my Patreon:


